Monday, September 30

Garlic Flatbread with Turkey Curry & Cucumber Relish

Continuing with my personal contest of making 30 Rachael Ray recipes in 30 days.... here's two more - recipe number 8 & 9 of 30. 


I made this in the place of tacos for Monday night football last week. Perfect. Fun. Easy. Family friendly. I think I had used curry once before this - so it was a tiny itsy bitsy intimating. Isn't weird how something like a ground up spice can be intimidating. But this recipe couldn't be easier or healthier. I highly recommend the turkey curry and flatbread if you have a little extra time or make the flatbread a day ahead and just store it in a gallon size freezer bag. I promise the flatbread just tastes an hr of time so if you have an hr to make dinner on the weekend, do it. Tastes like 100% better than the store bought stuff. Make the store bought flatbread taste really bland. Plus if you aren't a fan of garlic use another seasoning its extremely versatile. I made the flat bread recipe twice since I found the flatbread recipe in an old Everyday with Rachael Ray magazine. The turkey curry recipe is from a June/July 2007 magazine issue. Love the fresh bread smell in the house too. 


Homemade Flatbread
Serves 4-8 
1 hr rising time + 12-15 minutes active cooking time

Ingredients:
1 Tb sugar
2 1/4 tsp active dry yeast (1 package)
1/4 cup lukewarm water
3 cups of flour
1 Tb salt
1/2 tsp baking powder
1 cup buttermilk, heated 10 seconds in the microwave or left on the counter for a few minutes
Unsalted butter
seasoning of choice: garlic powder, roasted garlic or another (crushed dried rosemary,oregano, cardamom, or thyme)

Directions:
1. In a small bowl combine 1 Tb sugar with the yeast and warm water. Let it stand for 5 minutes to activate the yeast. Should look foamy and cloudy water. 
2. Into a mixer bowl mix together (with a paddle attachment if using a stand mixer) the flour, baking powder, and salt on low speed. Add 2 Tb melted butter and the slightly warmed buttermilk, and the yeast mixture last.
3. Switch to a dough hook if using a stand mixer, and add either 2 Tbs roasted garlic or 1-2 tsp powdered garlic or seasoning of your choice. Knead for 5 minutes on low until dough is smooth. 
4. Grease a bowl with butter or sprayed with cooking spray. Put the dough in the bowl and cover it with plastic wrap for 1 hr to let it rise. 
5.  To cook them up: Separate the dough into 8 equal pieces. On a lightly floured surface roll the dough pieces out one at a time. Aim for 6 inches or bigger - pretty thin. Spray the pan with cooking spray unless using a cast iron skillet. Carefully lay the dough one at a time in the hot skillet and cook for 1 minute and flip and 1 1/2 minutes on the other side. As soon as the bread is done sprinkle with salt and/or spread on some butter. Butter is more if you are eating it with chicken or meat like a roll instead of like a shell with Turkey Curry (recipe below).

*Option: Make it like a dessert - If making it as a sweet dessert don't use any sort of savory seasoning. Sprinkle each piece of cooked bread with powdered sugar as it comes out of the pan. Super yummy with honey as well. 


Turkey Curry with Cucumber Relish
Serves 4
Prep time 10 minutes, cooking time 15 minutes

ingredients:
1 zucchini, finely diced
1 red pepper, finely diced
2 Tbs olive oil
1 Tbs flour
Beef broth
white wine
1 lb of ground turkey
1 onion, finely diced
1 large tomato
flat leaf parsley
lemon zest from half of a lemon
juice from half of a lemon juice
salt & pepper to taste
1 Tbs curry powder

Directions:
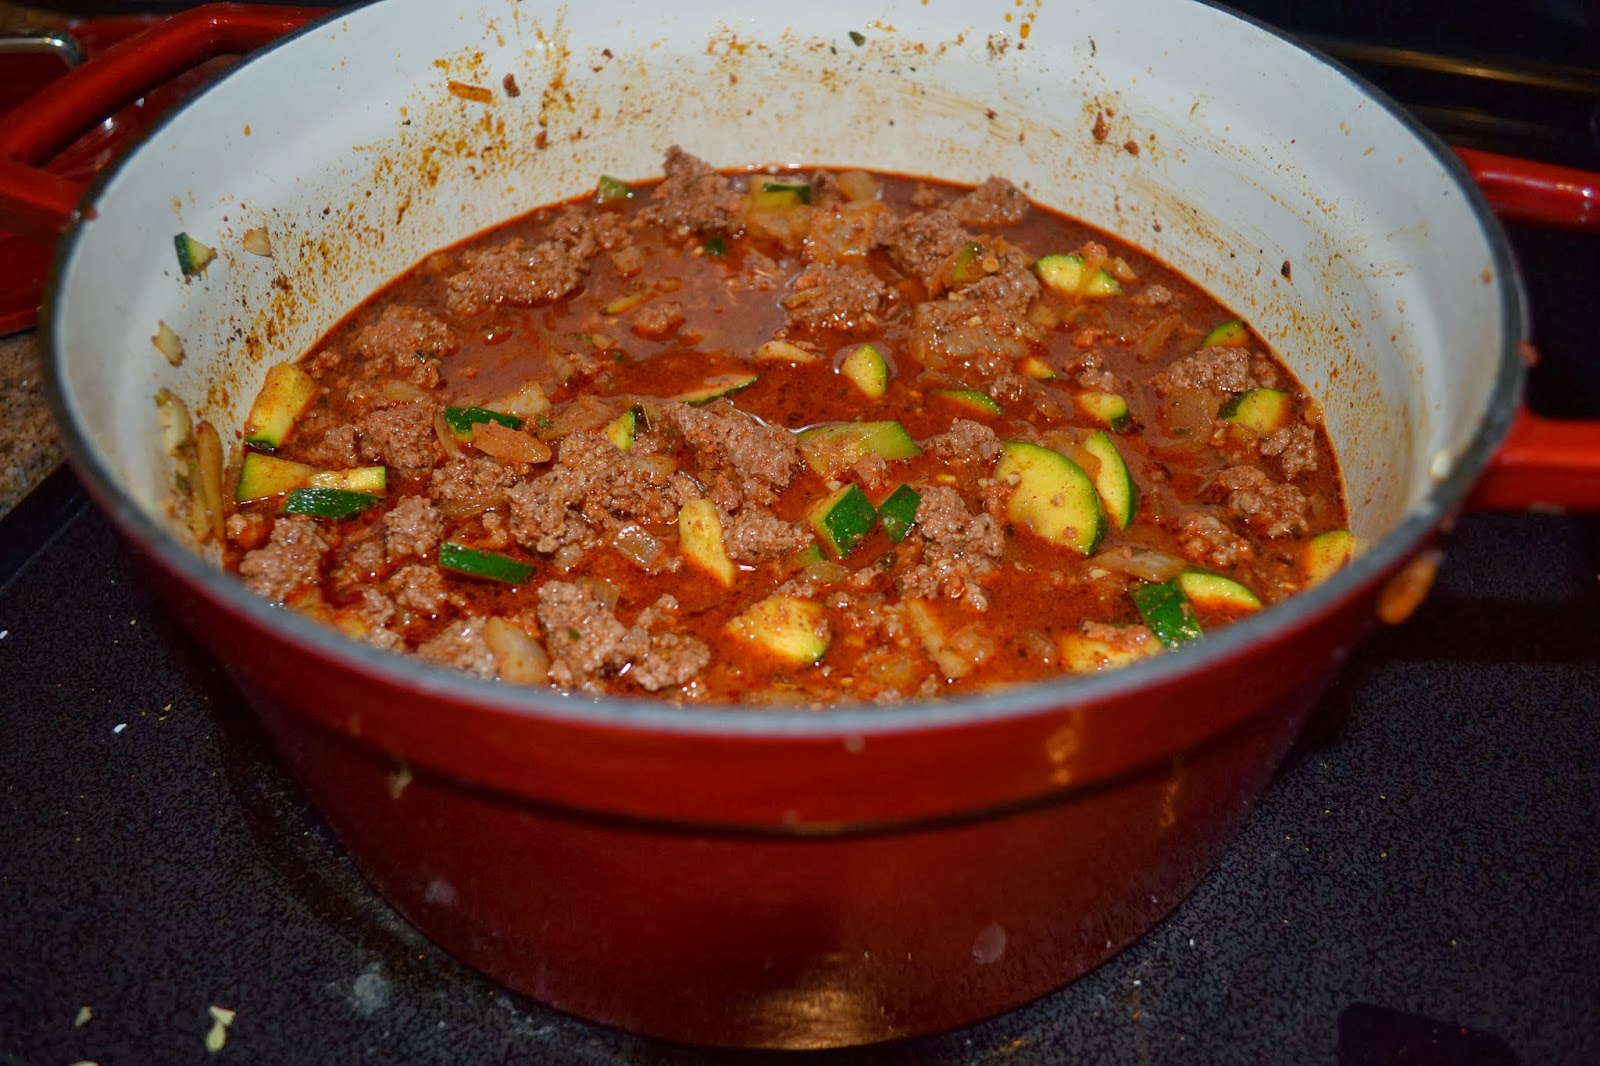
1. Heat the olive oil in a skillet to medium. Cook the onion, zucchini, and red pepper with the curry powder. Stir often. Cook for about 5 minutes until everything is tendercrisp. 

2. Add in the turkey and cook until its browned. Break up big pieces as necessary.  

3. Once turkey has those lovely browned bits (meat is caramelized) sprinkle the flour over everything. Let the flour cook out for 2 minutes. 

4. Lower the heat to low. Deglaze your pan with 1/4 cup - 1/2 cup of either beef broth or white wine or both. As the liquid hits the hot pan and creates steam use your spatula to get all those meats bits unstuck from the bottom of your pan.  

5. Cook over low heat and stir until meat mixture has thickened.  Serve with store bought OR the amazing homemade flatbread seen above.  

6. In a bowl combine the chopped parsley, lemon zest, tomato, and lemon juice. Serve it on the side for people to top their filled flatbreads with. Gives the dish a wonderful freshness. 

There two new recipes with endless ideas. I hope you try and eat and enjoy them. Change up taco night or sandwich night for something easy and fun with good fall veggies. Roasted squash or pumpkin, chopped into bite size pieces would be good additions with huge nutritional benefits. 

Eat well. 
From my kitchen to yours


Sunday, September 29

Football & Beef & Spicy Chorizo Zucchini Chili


I love fall here in southern Arizona. This is only my second fall but I am loving every single little second. Its like summer everywhere else. I know 90-97 degrees sounds hot but really this is very comfortable weather. Speaking of fall.... I can't celebrate fall without football and can't have football without chili. It is a tradition. Just incase you aren't a football fan.... (we'll have to talk about that later) there are other reasons to heat up a large pot full of meat and beans and some veg (aka chili). 

Here's recipe #7 of my personal goal of doing 30 new Rachael Ray recipes in 30 days. The original recipe can be found in the October 2012 issue of Everyday


Reasons to make chili: 
1. one pot of chili can feed like 30 people
2. it travels well (friend's houses,camping, potlucks,hiking)
3. it freezes well (good if you have a small family)
4. it reheats well (see reasons 2 & 3)
5. it is a great make ahead meal (see reason #4) 
6. the toppings you can put on chili and it still taste good are endless (chips, fresh tomatoes, onions, chopped green onion, caramelized onions, diced red onion, jalapeƱos, sour cream, greek yogurt, cilantro, chives, Oyster-style/saltine crackers, cornbread croutons, fresh chopped peppers, black olives, sliced avocados, guacamole, shredded jack cheese, shredded cheddar cheese, shredded sharp white, yellow cheddar.... etc.
7. Melted Cheese - you can load chili up with cheese - any dish that lets you have tons of melted cheese is a good recipe
8. Healthy - chili is a great place to get veggies into your diet if you aren't fond of them.


But in the end it does come back to football. It's like Fiddler on the Roof. Do you know that movie? My husband and I quote it often. It's how we roll. There is a whole song about tradition. It's good you could youtube it or something if you haven't ever heard it. So make some chili, sit back, and relax a bit. Just incase you are wondering the game I was most excited about was the Texans vs Seahawks game, and it did not disappoint! Crazy over time game. 

Spicy Beef & Chorizo Zucchini Chili

ingredients: 
1 Tbs vegetable oil
12 oz mexican beef chorizo
1&1/2 lb lean ground beef
2 heaping cups of zucchini, sliced
Tbs vegetable oil
1 Tbs minced garlic, 2 cloves
1/4 cup chili powder, mild
1 Tbs course salt
1 tsp pepper
1 heaping Tbs ground cumin
1 Tbs dried mexican oregano, or regular
1 1/2 tsp smoked paprika
1 can low sodium red kidney beans, drained
1 can (14.5) crushed tomatoes 
1 can (14.5) fire roasted tomatoes
1 large onion, chopped
1 small can of tomato sauce (I substituted 2 cups of my veggie filled red sauce from my freezer)
(click here for recipe)
toppings: I used green onion, cheddar cheese, and chips


directions:  
Start cooking beef and chorizo with oil in a very large pan. 
Drain some of the fat out once all the beef is browned. 
Add in everything else except for beans. 
Simmer the flavors together for 40 minutes.
Add in the beans. Remove from heat.  
If using as a make-ahead meal, cover and refrigerate. 
If freezing, cool it completely and measure it into food safe plastic labeled freezer bags. 
If eating immediately..... pull out some of the yummy toppings listed above, and invite some friends over for the game ;)


Enjoy. Go seahawks! 
From my football kitchen to yours


Friday, September 27

Crunchy Tarragon Chicken: Winner Winner Chicken Dinner

So in my adventurous quest to try to do 30 new Rachael Ray recipes in 30 days I have found recipe number 6. This is my winner winner chicken dinner. Crunch. Crunch. Crunch. This tasty Tarragon Chicken recipe was an overnight success at my house! I just like saying that word Tarragon. Its sounds so fancy. I don't think I will be cooking chicken any other way for quite a while. It was easy, flavorful, and (my favorite part) I was able to use a whole chicken cut up (which is a good for sustainable eating than only buying chicken parts).  It feels good to use a whole chicken and even a bit thrifty since I was able to use the chicken bones to make some chicken stock for my freezer. 


Look how beautiful and golden brown this chicken is when it comes out of the oven. The only thing that could've made it better was baking it on a sheet pan with a rack instead of my glass casserole dishes for that extra crunch factor. 

I made some changes from the original recipe, taken from. Rachael Ray's October 21012 issue of Everyday but I kept it to a minimum because I really wanted to see if it would work with chicken AND fish. Its like the game of Clue. Did you ever play that growing up? Clue is a board game where you had travel around the board asking questions to find out who killed whatever his name was, in which room, which what weapon.  I found the best way to throw people off your trail, or really confirm your suspicion about a room/weapon/or person you have to isolate different factors. So with this recipe I am isolating the breading changes so I make sure it works with chicken before I try it with fish. We are big fish eaters in my house. Although there will always be a place in my heart for a piece of crunchy chicken that stays moist on the inside! 


Crunchy Tarragon Chicken
Serves 5-8 (8 pieces of chicken) 
prep + cooking time: 25-30 minutes

Ingredients
1 whole chicken cut up into 8 parts
1 egg yolk
1 Tbs dijon mustard
3 Tbs fresh Tarragon
1/2 cup of grated or shredded good parmesan cheese 
(not the fake kind in the green container) 
1 cup of panko breadcrumbs
1 cup of olive oil
1/4 tsp pepper + 1/4 tsp pepper + 1/4 tsp pepper (divided)
1/2 tsp salt + 1/2 tsp salt + 1/4 tsp salt (divided)
half of juice from a lemon approx 1/2-1 Tbs
1 tsp of old bay seasoning


Directions:
1. Preheat your oven to 450 degrees

2. Pat your chicken dry and sprinkle it with 1/2 tsp salt, old bay seasoning, and 1/4 tsp pepper. 

3. In a bowl create a homemade mayo to dip the chicken into for glue for the crunchy breadcrumbs.  Combine: mustard, chopped tarragon, lemon juice, 1/4 tsp pepper, 1/4 tsp salt, and the egg yolk. I found by whisking these together and then SLOWLY adding in a cup of olive oil it thickens a bit faster. Also throwing it in the fridge for 2-3 minutes, covered with plastic wrap, makes it firm faster into a mayo-store bought sauce consistency. 

4. In a large bowl or flat dish combine panko, shredded or grated parm, and remaining salt and pepper. This part was kinda comical in my house because I was working from a triangle piece of parmesan cheese and didn't want to take the time to shred/grate it with my food processor so I actually diced it into fine pieces... seemed to work okay although I wouldn't advise it if you didn't have to - ie... weren't being lazy like me. 

5. If you are using a casserole dish - spray it with nonstick spray before you start getting your hands messy. Create an assembly line with the the seasoned chicken first, mayo second, breadcrumb mix third, and a baking sheet or casserole dishes at the end. So you are spreading, dipping, or dunking your chicken into the yummy wet homemade mayo, then rolling each piece in the seasoned breadcrumbs, and placing each piece of chicken on the pan or in a casserole dish to be baked. Try to give each other a little room - use two baking dishes if necessary to let the heat and air circulate in the oven so everything gets crispy and not damp from being crowded and steamed. 


6. Bake for 20-25 minutes until juices of chicken run clear. Everything should be crisp and golden brown. 

7. Serve & eat with your favorite veggies. As seen below, we had green beans sautĆ©ed with shallots & butter, and some homemade rolls I had so smartly tucked away in the freezer for a quick easy side. I love it when I am able to make just a tiny bit extra of rolls or bread and put in it in the freezer to just complete a meal a week, two or three weeks later :)  


Enjoy some crunch with this fun 
Rachael Ray recipe 
From my kitchen to yours


Thursday, September 26

Easy Braised Veggies in a Cream sauce (recipe 5 of 30)

Hi again. Check out this picture. 


This is my new favorite side dish and recipe #5 in my adventure to do 30 new Rachael Ray recipes in 30 days. It's exciting to try new things and a stretch to consistently blog. I have to tell you about the amazing veggies we had last night. Confession #2,037 I do admit to hiding my favorite veggie (spinach) in recipes to make sure my family eats them. Last night, nothing was hidden. There was no where's waldo veggie or hide and seek veggie game going on. (Can you tell I have a 4 yr old?) It was clear that the veggies were the star of the show. This elegant dish was the best thing on my plate. 

I previously thought the recipe was a winner from the moment I snatched it from an October 2012 issue of Everday, but by changing it up I got to use my second favorite veggie (brussel sprouts) in a new exciting way. My son didn't even grimace when he saw them (the brussel sprouts) on his plate. I don't know why brussel sprouts have gotten a bad rap. I think they are great. You will too after you give them a short dip in some lovely cream and cheese. Trust me. 


This dish looks elegant, but seriously it works with any normal sort of menu you probably already make like burgers, fish, chicken, steak, pork chops, or meatloaf. It's elegant enough for company, quick enough for a school night, and packed with nutrients. I might be in love with this new cheesy creamy side dish. 


Note: If you haven't ever worked with fennel before you have nothing to fear. Fennel is super easy to work and is similar to a large onion, an onion that won't create tears. When you first start cutting, cut them in half so you can find the core at the base of the oval shaped bulb. The core is small. I just make a couple of small cuts to get the core out, most of the time in the shape of a triangle. Chop the fennel into long ribbons almost in a v shape, and separate the layers. Give it a quick wash in a bowl and you are good to go. The fennel's common licorice smell is evident when the vegetable is eaten fresh, but milds considerably after cooking.


Easy Braised Veggies in Cream Sauce
Prep time: 3-5 minutes, Cook time: 15 minutes
Serves 3-4 (but in my house its 2-3 servings)

Ingredients: 
1/2 Tbs unsalted butter, organic
1/2 Tbs olive oil or bacon fat 
2 fennel bulbs, quartered, cored, sliced approx 1/2 inch think
scant 1/3 cup of half and half
4 oz or half a small block of jack cheese, sliced, diced or shredded
1 cup of fresh brussel sprouts, trimmed, about 5-7 of them
1/4 tsp salt 
additional salt & pepper to taste


1. In a large skillet with a fitted lid, melt the butter and oil/fat together over medium high heat. The oil helps the butter to not burn. Letting the butter brown just a little tiny bit wouldn't hurt the veggies either if you are a fan of that yummy nutty brown butter trend thats been everywhere on pintrest. 

2. Brown the fennel and sprouts together in the butter over medium high heat. Sprinkle on the salt. Cook for approx 5 minutes letting bits of them get good and golden (carmelized). Stir often. 

3. Lower the heat to low and add in the half and half. Scrap up the brown bits. Stand back a little as the cream will bubble up and create steam. 

4. Cover the skillet and simmer for 8-10 minutes on low. Stir every 3 or 4 minutes. Near the 7 minute mark sprinkle on the chopped or shredded jack cheese and recover the skillet.  As soon as the veggies are fork tender and the cheese is melted, it is ready to serve. 

5. Taste for salt and pepper. Garnish with the green fronds if your fennel bulbs came with the large celery stalk like ends. 


Easy Yummy Warm Side Dish
Perfect for Fall. Perfect for school nights. 
Enjoy!
From my kitchen to yours

Wednesday, September 25

Pumpkin Spinach Quesadillas (Rachael Ray Recipe # 4 of 30)


Hello fall. Its pumpkin time again!! So are you enjoying the fall season so far? I totally am. This is the 2nd pumpkin recipe I have tried! Super excited to eat all things pumpkin again. I have been watching tons of football, starting to not need my a.c. so much, and enjoying being outside at the park again with my kiddo. Yay for cooler weather! Speaking of football I have something perfect for sitting and eating at your next game (or sitting, eating, and yelling at the giants defense). Don't ask it was a rough week in fantasy football land. 


Pumpkin. Spinach. Cheesy Quesadillas. Having a spinach and cheese quesadillas would be healthy or just having a pumpkin quesadilla would be healthy but this combines both powerhouse veggies into one inviting cheesy meal. The diverse textures such as melted cheese, fresh veggies slightly softened to a tender crisp, and a small crunch from the walnuts give your taste buds a change from the ordinary. This is something fun, cheesy, you can eat with your hands. It can't get much better than that, right?

When I say quick I mean like 10-15 minutes and you're eating. This recipe was an emergence from a Rachael Ray recipe from her October 2012 issue Everyday and from the blog Taste For Life. I liked several aspects of both so I came up with this unusually tasty gem. The textures in this dish are so much fun.... cheesy melted cheese, fresh veggies, and a small crunch from the walnuts. 

Makes 2 large Quesadillas - Serves 2-4 depending on appetites - 16 wedges
Cook time: approximately 10 minutes


Ingredients:
1/2 cup canned pumpkin (make sure its only pumpkin not the pie mix)
1/4 cup packed fresh baby spinach
1/4 cup walnuts, toasted in a dry pan for a few minutes over medium
2 oz of low moisture mozzarella cheese, shredded (about 2 handfuls) or more
1 green onion
1/2 tsp Mexican oregano (regular oregano is okay too)
4 large or burrito size tortillas 
1 chicken breast, flattened or use 1 cup of chopped leftover chicken
1/2 tsp ground cumin


Directions:
1. Mix the the pumpkin, oregano, and cumin together in a bowl. 

2. Lay two of the 4 tortillas down and begin to layer the ingredients. First spread out the pumpkin mixture. Second sprinkle half of the shredded cheese on both tortillas. Third layer the sliced green onion, toasted walnuts, and fresh spinach. Note in the picture above I didn't even cut my baby spinach... just washed it and was good to go.

3. If you have leftover chicken shred it and put it on top of each tortilla next. If you don't have any leftovers, poach 1 chicken breast in 1/2-1 cup of water for about 6 minutes each side or use leftover chicken until it is well down. Let it rest for a minute and thinly slice the chicken. Place it over the spinach.

4. Top the chicken with the remaining cheese to act like glue and hold it together. Put the remaining tortilla on top like a sandwich.

5. Use two hands or a spatula to set the fully layered tortillas into a quesadilla maker on a flat skillet. and cook until golden brown and cheese is melted. Flip once if using a skillet. Sometimes even putting a dinner plate & a can of something from the pantry on top of the quesadilla while it cooks on a skillet helps compact the ingredients so the cheese binds things together faster.  

6. Cut into wedges and serve with some chips, salsa, &/or guacamole


Lets get into the fall spirit with a fun easy meal 
everyone will enjoy. 
From my kitchen to yours


Monday, September 23

The trouble with Cooking and Blogging + Recipe #3 Rosemary Leek & Yellow Squash Soup


I have been cooking and baking a lot lately. Part of it has to do with summer ending and my freezer looking empty, the abundance of pumpkin, squash, & zucchini lookin' so good at the grocery store, or this little contest about cooking/baking 30 Rachael Ray recipes in 30 days. So yes lot of cooking.... 

I am constantly trying new recipes so this isn't a huge change from my family but blogging AND cooking AND trying to keep up with the dishes (yeah some reality there) is a bit more exhausting than I may have previously realized. Although it does seem pairing down my huge stack of cooking magazines in my kitchen with recipes that I keep saying 'I will try someday'. But I am only on day 3 errr recipe 3, and I already see a potential problem.... what if the recipe I make doesn't turn out. How is a person supposed to blog about something that was good or okay. I want to blog about the best bites.... those bites that you can remember days, months, years later. So in other words, I have a new found respect for those amazing cookbook writers that have deadlines and cooking competing each other. 

My plan this morning was to write about the pumpkin bread I made, but only moments after I had sliced the warm pumpkin-y bread I heard my husband ask if the we had any of that "other bread" still. Sigh. He's talking about a delish zucchini coffee cake I made a week ago that didn't even last a whole 24 hrs. (click on the title to see the recipe). I thought the warm, buttered, golden colored pumpkin bread was good, but it created enough doubt to make me rethink my blogging plans. Darn. 


So plan B. Do I have a plan B? Yes by accident. Thanks for asking. I made a new soup recipe for lunch. Fall is the perfect season for soup. This light, creamy, veggie filled, soup is easy, and only 5 ingredients, and is done in less than 15 minutes. I found the original recipe in an August 2007 issue of Everyday, modifying a cold summer soup into a fall soup with a touch more of flavor from dried herbs, warm broth a little less fat than the original. 


Rosemary Leek & Yellow Squash Soup
Serves 4

Ingredients:
3 Tb organic butter, unsalted
1 leek, washed and chopped
1/2 cup of half & half
3 cups homemade or store bought chicken stock/broth
3/4 lb of yellow squash, chopped (2 or 3)
salt & pepper to taste (I started with 1/4 tsp salt, 1/8 tsp pepper)
1 tsp dried rosemary, crushed


Directions:
1. Over medium heat saute the leek and squash pieces in the butter for about 10 minutes until it is tender. 
2. Add in the cream and bring it to a boil 
3. Remove from heat, use an immersion blender or a blender or food processor to puree the mixture. 
4. Return it back to the stove. Add in the seasonings and the chicken broth. 
5. Taste and adjust seasonings. Heat through and serve with crackers or toast. 

Enjoy fall with yummy healthy creamy soup
From my kitchen to yours!

P.S. If you have a good pumpkin bread recipe please a leave a link in the comments below - will be needing one or will be making a lot of zucchini coffee cake in the my future (oh darn)

related soup recipes:
Simple Tomato Soup
Tomato Basil Hidden Veggie Soup
Classic Butternut Squash Soup


Saturday, September 21

Rachael Ray's Spanish-Style Enchiladas (Recipe #2)

Hi. Recipe #2 of my challenge to make 30 Rachael Ray in 30 days is Spanish Style Enchiladas. As most places are starting to cool down into the fall season I wanted to share a comforting cheesy enchilada recipe. This is freezer friendly, football crowd friendly, family friendly if you keep an eye on the heat level, and an easy way to get veggies into your kids under some delicious melted cheese. Multifaceted food!


I heart enchiladas. I heart my mom's enchiladas. But this isn't your mom's or my mom's good old fashioned enchiladas. There is a fun twist for those unsuspecting taste buds hidden under all that delicious cheese. 


When you slide your fork through the cheese, the wonderfully red sauce, and into the tortilla for that first bite, you smell a hint of cinnamon and paprika. You lift the fork up to your mouth and smell the wonderful warm spices and the smokiness of the tomato. You are hungry so you just put it in your mouth and those normal Mexican flavors you were expecting aren't there. Instead you taste those warm Spanish/European flavors of cinnamon, paprika, tomatoes, parsley, onion, garlic, and even some smoky sausage. It throws your taste buds for good solid loop, but tastes so good you just keep eating. 

The leftovers are even better. It's one of those meals that just has love inside. Treat yourself, a friend, or family to this dish full of melty cheese, flavorful chicken, and all those wonderful warming flavors in Spanish (paprika, cinnamon) cooking that make you feel warm inside. 


(My take of) Rachael Ray's Chicken & Sausage Spanish Style Enchiladas

Makes 6 large enchiladas 
Double it for football games

*One of the big changes I made to the original recipe was using kielbasa sausage instead of spanish chorizo. I had trouble finding it spanish chorizo at the store. Does that happen to anyone else too? First world problem - for sure. Mexican chorizo is easily found, but it is a softer meat, has different spices, and has a different texture so I didn't sub it with that.

Ingredients: 
1-2 Tbs Olive oil

6 oz (half of a package) of Spanish chorizo, removed from casings and diced or half of a package of kielbasa sausage  

1 leftover chicken breast from previous meal, cooked fresh poached, or one breast from a freezer meal. I used this salsa chicken freezer meal for my chicken - just pulled one breast out of the freezer bag and used the rest of the chicken on other things during the week.  

1 heaping tsp of minced garlic
1 1/4 tsp heaping of smoked paprika
1/8 tsp pepper
1/4 tsp salt
1 red pepper finely diced
1 carrot, washed, peeled, finely diced
1 jalapeno pepper ( I took the seeds out for my 4 yr old - leave them in for some heat)
1 bay leaf
1/2 Spanish onion, chopped
1 cup of chicken broth or stock (used homemade)
14.5 oz can of fire roasted tomatoes
8 oz can of tomato sauce
1/4 tsp cinnamon
2 + (Use your own judgement) cups of jack cheese, shredded (pepper jack or manchego would be good options)
1 handful of flat leaf parsley chopped
1 handful of cilantro chopped (optional for garnish)
sour cream (optional)

Directions
1. Heat olive oil in a large skillet or pot over medium heat. 

2. Brown up the sausage, and set it aside to cool using a slotted spoon. If your chicken is raw start cooking that also or wait and cook it in the same pan as the sausage to capture some of that flavor. If you are using leftover chicken, pull it out, shred it with forks or fingers and set it aside. 

3. To the pan with the drippings add another 1 Tbs of olive oil if needed (depends on how much fat came off the sausage). Then add the garlic, red pepper, carrot, jalapeno, bay leaf, onion, salt, and pepper. Saute together for 6-7 minutes until everything is softening.


Look at all those colors :)

4. Add the chicken stock, paprika, tomatoes, tomato sauce, and cinnamon to the skillet or pot.  Simmer for about 15 minutes (low-medium heat just enough to help it thicken up)


Note: The first time I made this dish I left the enchilada sauce chunky. Next time I make it I will be smoothing it out so I am adding step 5 in. So my pictures might look different from what you will end up. That is the only difference. Doing or not doing step 5 won't change the taste but will make it easier to eat. The veggies left in chunks over the top of the enchiladas were messy to eat and required a fork and knife. 

5. Take the sauce in 2-3 batches and puree it with a food processor, blender, or immersion blender.  Please be careful when handling hot liquids. I have found that putting a small hand or kitchen towel around the lids of those times of kitchen tools are very helpful just incase something splashes up. 

6. Grab a large casserole dish (11x 7) or whatever you have and spray a little bit of cooking spray on it. 

7. Put one large ladle or measuring cup spoon full down into the bottom of the casserole dish. 

8. Dip your tortillas in that lovely pureed sauce you just made and flip it over with your hands or an utensil. Put line up your sauced tortillas on the counter or do them individually on a plate to be less messy. 

9. Divide the cheese in half. Use the first half of cheese by putting an equal handful in the center of each tortilla. The second half will top the rolled tortillas. 

9. Combine the chorizo or sausage whatever you are using with the chopped parsley and chicken in a bowl. Evenly distribute this delish combo onto the tortillas as well. 

10. Roll the tortillas but folding over two of the side in towards the middle, holding the sides while you roll the bottom up almost over to the top. Finish it but rolling it over and putting it steam side down in the pan. 


If you puree your sauce it will look smooth and beautiful unlike this chunky beauty in the pic

11. Preheat your oven to 400 degrees while you finish rolling the rest of these beauties.  Top the rolled enchiladas with the remaining sauce and cheese. 

Note: If you are making this as a freezer or make ahead meal. Finish rolling your enchiladas, top them with cheese and sauce. Let it cool on the counter completely. Cover and freezer or Cover and chill until you want to make it. 

12. Bake for 35 minutes until it is hot, bubbly and the cheese is browned. Serve with favorite toppings such as cilantro, sour cream, beans, rice, chips, salsa, ect.  


Enjoy the beginning of fall with this warm comforting dish! It's sure to please and surprise. 

From my kitchen to yours


Friday, September 20

30 Rachael Ray Recipes in 30 days: Avocado Tuna Bacon Salad

To celebrate the start of fall this year and to create a new challenge I am going to cook & blog 30 new (to me) Rachael Ray recipes over the next 30 days. I have been a long time fan of Rachael Ray's recipes so I am only going to focus on things I haven't made, fit the lovely fall season, and is football worthy food Trust me when I say I have stacks of her magazines and printed recipes from many different shows that are years old. I promise to find the good ones to share with you. Cooking magazine stacks....... does anyone else know what I am talking about here? 


I picked Racheal Ray, despite many of the good celebrity chefs, because I love her creativity. She does focus a little on meatless meals, cooking with veggies, and makes family friendly stuff. Making family friendly, family approachable meals is so important to me because I am not one of those parents that cooks up frozen kid meals while I make something else for myself. While, I let my hubby and son get away with a few things like commercialized cereal at breakfast, or an occasional handful of sugar covered/yogurt covered pretzels at lunch, in our house, at dinner everyone eats the same thing. Some things are harder than others because of my son's small hands... like a huge open faced sandwich is a difficult maneuver. But its been that way since we adopted our little guy and it works. If you don't cook for your whole family at dinner time, it might be worth considering that this could be a fun new experience for you. Not because it would save you time and money by not having to cook two separate meals, but to create new family experiences together. 

Please come on this fun trip over the next 30 days. Check back everyday and see if you might find something good to eat too. 


Anyways... to start off this fun challenge and if you need another reason to cook bacon here is my version of an avocado tuna bacon salad with homemade bacon mayo. The mayo, which has been adapted to fit into this beautiful tuna salad, originally was a make ahead meal for buttermilk fried chicken coleslaw sandwiches. The sandwich was good. I would probably make it again, but the clear winner of that dinner was this mayo. It was unforgettable!! Please click on the title above to see the original recipe.

Note: anything with bacon should have an 
explanation point


my salad... forgot to put the bacon before the picture... got distracted by the avocado... ooops! 

When you add this little condiment to your tuna, you are able to create a tuna salad that is so elevated, it lands in another stratosphere. Additionally you can use this condiment on sandwiches with the same results. No more boring tuna and no more boring lunch time sandwiches. 


Ingredients for one salad 
(double as needed)

2 cups of romaine lettuce, cleaned and chopped
1 roma tomato, sliced
1/2 sliced avocado
1/2- 1 full cucumber chopped (depending how much you like cucumber) 
1 green onion, sliced green & white parts
1 can of tuna, drained
1/4-1/2 cup of mayo
2 Tbs of secret sauce (recipe below)
2 pieces of bacon, pan fried to a crisp and chopped into pieces

Directions for salad:

1. Cut up all washed veggies into a bowl or plate.
2. Combine the tuna, mayo and secret sauce in a small bowl.
3. Taste the tuna and add salt and pepper if needed. 
4. Top the fresh veggies with the tuna for a large adult salad
5. Garnish the salad with the silky buttery avocado and crunchy salty bacon chunks


Ingredients for secret sauce  
(makes approx 1- 1& 1/2 cups)
The sauce is good for 1 week covered and kept cold. 


2 slices of bacon, pan fried in 1 tsp olive oil, drippings kept
1 tsp grainy country dijon mustard
1 Tbs lemon juice
2 egg yolks 
2 tsp rice wine vinegar
1/2 cup olive oil
1/2 tsp salt
1/2 tsp taco seasoning store bought or click here for a recipe

Directions for sauce
1. Separate your eggs yolks.
2. Fry up your bacon. Keep the drippings. 
3. Cut the bacon into small pieces after cooled on a paper towel. 
4. Whisk everything together except the oil, bacon, and drippings. 
5. Slowly drizzle in the olive oil while still whisking. Add in the bacon drippings and the bacon chunks. 
6. Set aside covered. It will thicken up within 5-10 minutes. It will be a thick spreadable mayo like sauce after cooling in the fridge.


There it is. Most incredible tuna salad ever! 
Many more recipes to come all inspired by Rachael Ray. 
from my kitchen to yours

Thursday, September 19

Brown Sugar Zucchini Coffee Cake

So I have been sort of obsessed with zucchini lately in case you haven't noticed. But its totally the season for it. I heart this season. I have thrown zucchini into sauces, made chili with it, and now just had a blast making it into a coffee cake with brown sugar and cinnamon.... oh my. 


The smell of cinnamon and brown sugar baking away was so great....
we had to occupy ourselves with a crumpled up piece of paper.  Happens.

This coffee cake smelled definitely like dessert in my house - not talking about a healthy dessert either. You know the ones in which you can tell the oil has been substituted for applesauce and the person went so overboard its more than a little dry. Ouch. Been there. Anyways. This recipe is from one of my favorite bloggers, Lindsay at A Pinch of Yum.  She has amazing recipes over there. She has a new e-book too - if that is more your alley.... download it to your tablet/phone/ipad and off you go to the kitchen or just drooling over food pictures from your couch ;). I adapted it a bit to try to get a bit more zucchini into it, and some subtle other changes like more brown sugar and more cinnamon. 

Seriously glad I halved this recipe - it was gone in like less than a whole day. Was so easy to make, and so good you just wanted to keep eating. It was the perfect afternoon snack with coffee and breakfast the next day. 


The buttermilk made it so tender and moist, the zucchini was undetectable, and the ribbon of gooey cinnamon topping half way through was magic. The butter and brown sugar melts and creates a whole new texture within the cake. As you slice into this thing ( I do advise using a fork) the texture changes from light and fluffy to dense and that almost underdone gooey brownie or center of the cinnamon roll texture. Oh my.... yes definitely the best coffee cake recipe ever. I cannot believe it has a veggie in it. Well I didn't tell my family and you won't have to tell anyone either. They won't be asking. Promise. I will be making it again soon. You should too. 


Best ever zucchini coffee cake
Serves 4-6 (or 2-3 in my household)


Ingredients for the cake:
1/2 cup of buttermilk
1/6 cup of olive oil (I used 1/3 cup filling it half way full)
1/2 tsp vanilla
1 tsp baking soda
1 cup whole wheat white flour
1 egg
1/4 cup of all purpose four
1 cup of zucchini, shredded & drained/water squeezed out
1/2 Tbs of orange zest
1/2 cup + 1/6 cup (1/3 measuring cup half way full) brown sugar

Ingredients for the sugar/cinnamon topping:
1/2 cup brown sugar
1 tsp cinnamon
1 Tb butter, unsalted, organic


Directions:
1. Preheat the oven to 350 degrees.
2. Combine the topping ingredients. It should look like wet sand. Set it aside. 
3. Mix the cake ingredients together.
4. Pour half of the cake into a greased pan. I used my glass square one. But thinking next time about using my loaf pan to make it a bit taller like banana bread.... 
5. Sprinkle half of the cinnamon brown sugar topping over the first layer of cake in the pan. 
6. Repeat with the remaining cake batter and topping mixture. 
7. Bake for 40-45 minutes.  Let it cool for a few minutes to make cutting/slicing it into neat squares easier. 


From my veggie filled kitchen to yours
Enjoy Fall!